Your first model upload — what happens next
Learn how WeReno parses your model file, assigns zones, and generates your 3D twin automatically — and what to do in the first 10 minutes after your model goes live.
Overview
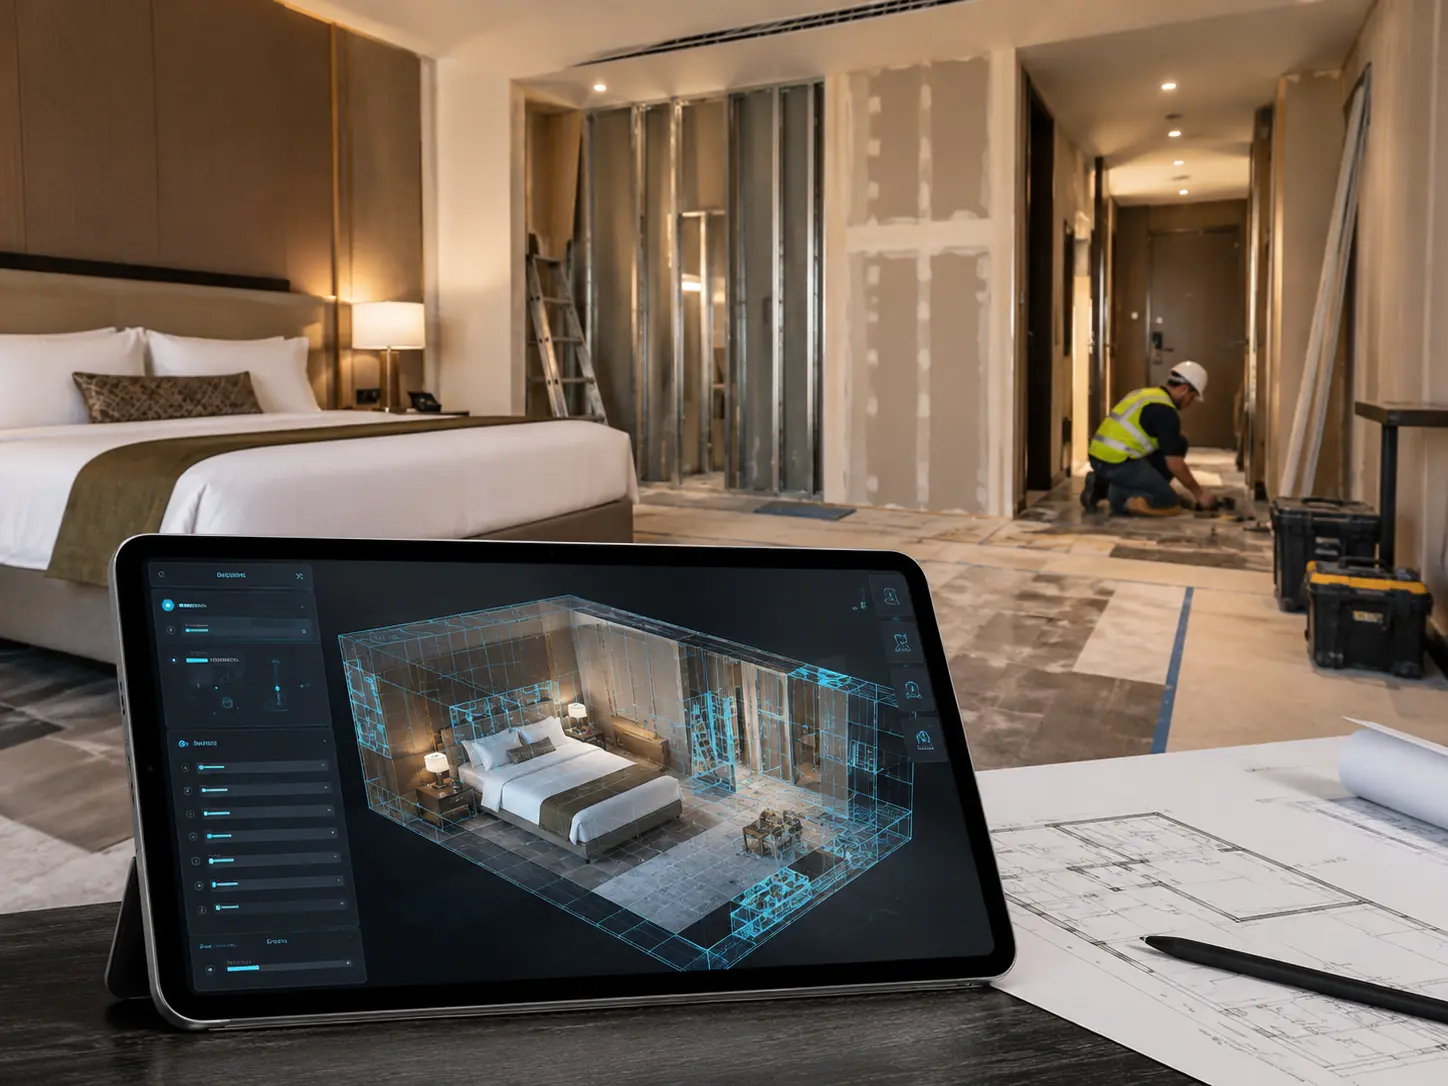
The moment your model finishes uploading, WeReno begins a multi-step processing sequence that extracts geometry, classifies spaces, and builds the navigable twin. This tutorial explains exactly what happens during that process and what you should check as soon as your twin is ready.
You’ll learn how to
-
Understand the 4-stage processing pipeline: geometry extraction, zone classification, metadata, and rendering
-
Review the zone manifest and correct any spaces that were misclassified during processing
-
Set your project baseline: add scope categories, assign trades, and set milestone dates
-
Share your twin link with the first stakeholder and walk them through the interface
Key takeaways
-
1
WeReno extracts room names, areas, and spatial relationships directly from your Revit model.
-
2
The zone manifest is your first QA checkpoint — review it before inviting external stakeholders.
-
3
Setting scope categories in the first session reduces rework and confusion across the whole project.
The 10 minutes after your model goes live are the most important setup window in any project. Reviewing zones, setting scope structure, and configuring access levels at the start prevents downstream confusion and makes every subsequent collaboration session more productive.